Support by service : Frequently Asked Questions about Arcstar Universal One Virtual
Service menu support information
![]() Service menu support information
Service menu support information
I would like to know how to install vApp.
Since the way is different depending on the OS, please refer to the explanation of the OS that you are using.
【Android】 【iOS】 【Windows】
also,「vApp Operation Guide 」can be helpful to you.
| [Android] | |
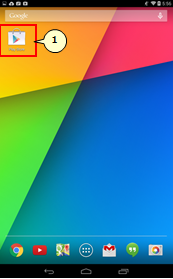 |
(1)Tap the icon of Play store on the home screen |
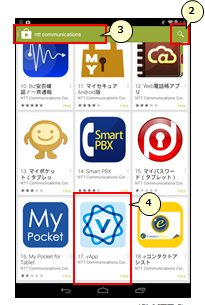 |
(2)Tap the search icon. (3)Enter "vApp" or "NTT Communications" and then perform a search. (4)Tap [vApp] application. |
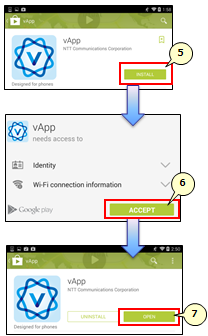 |
(5)Tap [INSTALL]. (6)Tap [ACCEPT]. (7)Tap [OPEN]. The app will open and installation is done. |
| [iOS] | |
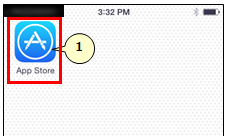 |
(1)Tap the icon of vApp on the home screen. |
 |
(2)Tap the search icon. (3)Enter "vApp" or "NTT Communications" and then perform a search. (4)Select "vApp" and then tap [FREE]. Installation starts. |
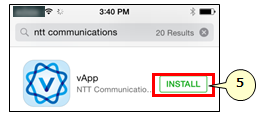 |
(5)Tap [INSTALL]. |
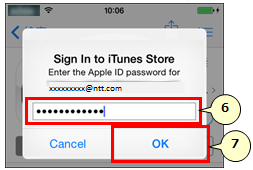 |
(6)Enter the password of AppleID. (7)Tap the [OK] button. |
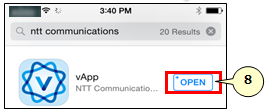 |
(8)Tap [Open]. Installation is done. |
| [Windows] | |
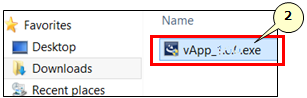 |
(1)Access Arcstar Universal One Virtual support site. http://support.ntt.com/ Then, download the vApp(Windows). (2) Right-click “vApp_XXX/exe” which was downloaded. |
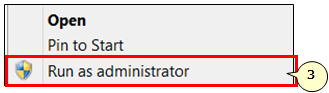 |
(3)Click “Run as an administrator”. ※If you don’t run as an administrator, an installation error may occur. |
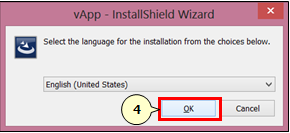 |
(4)Select the language which is used during installation, then click "OK". |
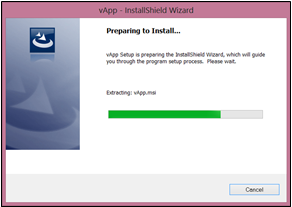 |
*If Microsoft .NET Framework 3.5 Client is not installed on the PC in use, "InstallShield Wizard" will be activated and proceed to an installation. Wait for a while. |
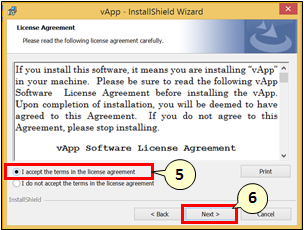 |
(5)Read articles in the Software License Agreement, then select “I accept the terms in the license agreement" when there are no problem. (6)Click “Next”. |
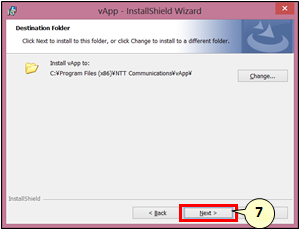 |
(7)Click "Next" when the screen on the left appears. |
 |
(8)Click "Next" when the screen on the left appears. |
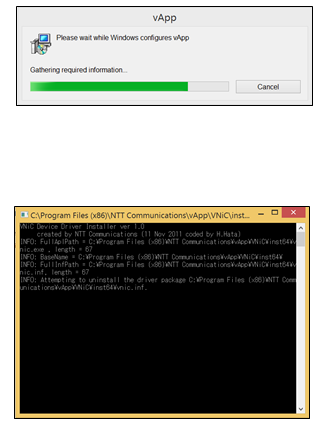 |
(9)Installation starts. Please wait during the screen on the left is shown. |
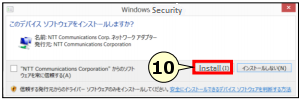 |
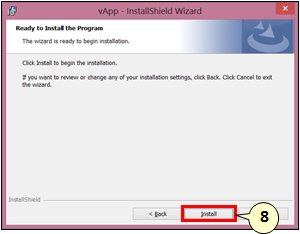
(10)Click "Install" when the screen on the left appears. (This example is Japanese version.) |
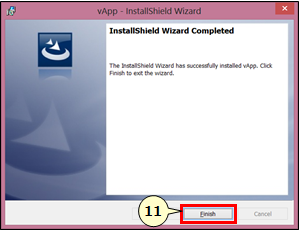 |
(11)Click "Finish" when the screen on the left appears. Installation work is complete. |